Bayonetta Chapter 15 Verse 9 Easy Mode
Chapter XV: A Tower To Truth is the fifteenth chapter of the first game, Bayonetta. Nearing the end of her journey, Bayonetta scales the impossibly high Ithavoll Building, pitting herself against almost every angel in the game to find Cereza again then get to the next section.
Ithavoll Building
Verse 1 (Optional)
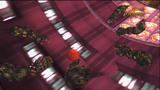
You start the chapter in front of two statues of Fearless. You can ignore them and skip this Verse, but if you attack them, the angels will break out of the stone and try to kill you. Defeat them to complete Verse 1.

Verse 2
Head to the right of the Fearless statues. You will need to use Panther/Crow Within to cross the gap. On the next platform, you will find a Treasure Chest (Broken Witch Heart). On Normal difficulty, keep walking until you can't go any further. If you stand on the left-hand corner of the platform, a Crow will be looking down on you. Double jump and wall jump to reach it.
Go back to the starting platform, and head to the left of the Fearless statues, then climb up the stairs. At the top, you will come across a group of Dear & Decorations. Once they are defeated, a pair of Flaming Ardor will appear; if you have Durga Fire equipped to your hands and feet, you will be immune to the flames and thus able to attack them without using Witch Time.
Verse 3
After defeating Ardor, proceed up the stairs. There will be a doorway on the right side, between a pair of empty Grace & Glory statues. Go through the door to face Braves. Initially, it'll be just one Brave then the other two will appear shortly afterward. They will immediately try to merge into a Beloved, so quickly take out at least one of them if you want to prevent the transformation.
After killing the Braves, run out the door and up the stairs. There will be another doorway on the right side, between another pair of statues. These ones are not empty, however.
Verse 4 (Optional)
You can ignore the statues and skip this Verse, but if you break them, be prepared for a fight against Gracious & Glorious. Defeat them to complete Verse 4.
These angels are widely regarded as the most difficult and powerful enemies in the game. Recommended weapons are Durga Lightning, Shuraba, Odette, and Sai Fung. Recommended item is the Moon of Mahaa-Kalaa because you cannot trigger Witch Time by dodging their attacks, but you can trigger it from this item's Counter ability.
Durga is fast enough to let you stay mobile in the fight, the Charge Modifier is strong enough to stun them both if they are close together so if you stun them you have some breathing room. Shuraba is the jack of all trades: it has speed, range, and powerful Wicked Weaves. Odette will simply make you more mobile on the battlefield (and if you are dealing with multiple enemies it can possibly freeze them). Sai Fung has the best stagger rate, and it is the fastest weapon in the game with the most damaging Wicked Weaves; this is the best choice against pretty much every enemy.
Gracious and Glorious are essentially the same as Grace and Glory, only much tougher. They deal more damage and can take more of it, and are slightly faster. Be warned that their attacks cannot be used to activate Witch Time normally, regardless of difficulty, making them a much more challenging enemy to face. The Torture Attack does only around half of the damage than that for Grace & Glory so you will need to take a lot of damage from them if you want to kill with it.
Verse 5
Proceed through the door, and you will face a pair of Joy.
Verse 6
Once you've dealt with the Joy duo, proceed through the door and head up the stairs. At the top, you will be facing a group of Enchants on the floor. After defeating them, you will have to fight against Grace & Glory (Gracious & Glorious on Hard).
Verse 7
Run up the stairs, and advance through the hallway. Temperance, another clone of Temperantia, will soon appear and start punching the walls. Use Panther Within to outrun the damage it is doing. After a few hits, he'll become stuck and you can proceed. As you do, you'll come across a group of Affinities. (Flaming Affinities on Hard)
Clone Fight - Temperance
Verse 8
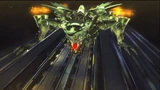
Run up the stairs and onto the next level. Keep going until Temperance breaks down the wall. Now, he means business. You must go through the broken wall and hop onto one of the two Anti-Air Cannons. Shoot the cannon at Temperance, but be careful because he will be shooting green missiles at you. These missiles can be destroyed with shots from the cannons. You can also try to activate Witch Time by dodging right before one of those missiles hit you. Move then to the other cannon, and start shooting at him while you have the slowed time effect. Occasionally he will shoot red bullets, but they tend to not head in your direction.
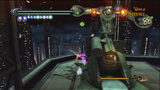
Keep dodging the missiles and attacking him. Once most of his green health bar is down, he will use the forehead laser, which does a lot of damage. It is possible to dodge it or to avoid taking damage by going back inside the building and standing behind the remains of the wall. When it's over, get back outside to use the cannon.
When about half of his health is gone he will come close and punch one of the cannons. You can counter it, but if you don't, the cannon will be destroyed. When his health is down to about 1/4, Temperance will fire one more laser.
Afterward, it'll be back to just missiles. Once he is defeated, you can proceed.
Ithavoll Building
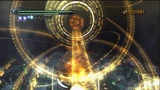
Verse 9 (Alfheim)
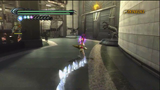
After defeating Temperance, backtrack all the way to the beginning of the chapter, then cross the gap towards the platform with the first chest. On that platform will now be a portal leading to the twentieth Alfheim level, which serves as Verse 9.
Clone Fight - Justice
Verse 10
From the area where you fought Temperance, proceed past where the angelic border was, pick up the pages of Antonio's Notes, and go left. You will end up in a dark room with two exits that are blocked by metallic fences. On Hard difficulty, you can release a Crow from its prison of despair in the right corner. Destroy the fence on the left exit and walk outside.
After a brief cutscene, you will go through a Quick Time Event. You will then have to Witch Walk up the elevator shaft. As you go up, the glass will break and elevators will fall. You should be safe if you stay right in the middle of the shaft. Justice will then appear and engage you in a fight.

Justice will try to use its tentacles to hit you, either by slamming them or by performing a sweep. Dodge these attacks. If you can, try to stay close to the child's face, or go into Witch Time to do extra damage. Justice will even use the child's face to hit you, it'll rear back then lunge forward. When it does, dodge to activate Witch Time and do as much damage as possible. Constantly use your guns. They do decent chip damage, plus you don't have to get too close to the child's face. If you do then it will thrash around trying to hit you.
After most of its health bar is gone, the child's face will fall down. Jump on it, as you did with Iustitia, and run along the tentacle. Make sure to dodge the spinning blades and other tentacles. Once you reach the face, attack it to finish off the angel.
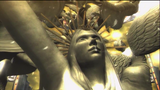
When it's done, resume your ascent of the elevator shaft. On the top, you will see an open hatch. Jump down, and exit the room where you land. You will find yourself in a large circular room with a giant statue in the center. Keep moving, and you will run across an entrance to the Gates of Hell, in case you need supplies or something. From there, turn right into a room of floating platforms. A Treasure Chest (Broken Witch Heart) can be found at the back of this room, on the right side. On Infinite Climax difficulty, a Crow will be plotting angelic schemes in the left side corner. When you're ready, hop up the platforms to get to the upper level, for a better look at the statue.
Ithavoll Building
Verse 11 (Optional)
Move along the circular platform, counter-clockwise, around the statue. You will soon see another opening in the floor, with a pair of small floating platforms similar to those you just used. Jump down and you'll face a group of flaming Affinities (a pair of Joy on Hard). Defeating them is required to complete Verse 11. On Normal difficulty, you can rescue a Crow from its prison of loneliness, in a corner of the room near the place where you jumped down. On the other side of the room is another opening in the ceiling, another set of small floating platforms, and a Treasure Chest (Red Hot Shot). Hop back up, and some of Antonio's notes should be right in front of you.
Verse 12 (Optional)
Move along the circular platform, until you come to a large ornate circle surrounded by gold. Witch Walk up the golden strip then activate the mechanism. Spin it in the correct direction and you'll see a brief cutscene. (This part isn't optional).
Hop across the small squares before they disappear, and you will soon land on a strip of somewhat larger squares. If you move across those, a pair of Flaming Affinity will spawn (a single Joy on Hard). You don't necessarily have to fight them, but defeating them is the first part of what is required to complete the Verse. Once you have, move towards the end of the strip (left of where you came from), then jump across the smaller squares to reach another similar strip of large squares in front of you. Repeat the process to reach the third strip of large squares. On this one, two more Flaming Affinities will spawn (another Joy on Hard). Defeat them to finish Verse 12.
Verse 13
Hop on the small floating squares to move across the area. Be careful if you see some of them glowing, as it means that they will soon disappear. On the other side, you will find yourself in some sort of giant cylinder, paved with larger squares. You should see a stone platform with two doors, protruding from the cylinder. Do not go near it just yet, as it would trigger the next boss fight.
Move across the larger squares, to the left from the platform with doors, until you reach another stone platform. On this one is a Treasure Chest (Broken Moon Pearl). From this location, look around and you should see a set of floating platforms. Jump across them, until you reach the larger one in the middle, where you can loot a Treasure Chest (Broken Witch Heart), and find the last collectible entry of Antonio's notes (the final entry will be automatically added to your notes if you have collected all others). On Hard difficulty, jump across the floating platforms on the other side and you will reach a third stone platform, where a Crow is waiting to be released from its prison of anger.
When you're all done, return to the stone platform with two doors, and jump on it to start a fight with Golem. Remember that Golem can take many forms that mimic your own Demons. Golem will start as a child of the spider, then the bird then turns into the pair of hands followed by the centipede. Only the red core can take damage, so it must be targeted, ideally during Witch Time for more damage. Your best chance at triggering Witch Time is by dodging the punches from the pair of hands. You can also dodge the centipede as it runs in circles, or the spider as it sends fireballs, or attempts to body slam you.
For the Climax, you'll summon Hekatoncheir to play volleyball again. When the Golem is dealt with, proceed through the door.
Clone Fight - Prudence
Verse 14
You will have to Witch Walk up to an elevator shaft once again, where you will soon come across Prudence, the clone of Sapientia. Prudence does similar attacks as Sapientia did. He will try to hit you with his hand and try to bite you. Dodge these attacks, and do as much damage as possible.
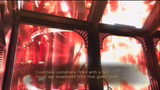
After he is defeated, you will see a brief cutscene. Be prepared: as soon as the cutscene ends, flames will be quickly crawling up towards you. You must use Panther Within to stay ahead of those. It will look like the flames are engulfing you, but as long as you keep running straight away from the flames, in Panther form, you should be fine. You will eventually come to a glass dome, run across it, and you will automatically crash through the glass. You will land in a safer place: a sphere being held by four ropes. Destroy the red orbs to cut the ropes. After a brief cutscene, you will have to travel along a golden path until you reach a portal. Move into the portal to end the Chapter.
Items
Antonio's Notes Locations:
- Verse 10: After you defeat Temperance as you proceed to the next area the book will in the hall. (Island In The Sun - Isla Del Sol)
- Verse 11: Before you jump down the hole the book will be right before it. (Ithavoll CEO - I)
- Verse 13: As you run up the squares you'll come to a large strip of the big squares. To the left of the platform with the two doors is another platform. The book and a chest are on that platform. (Ithavoll CEO - II)
- Received after you have collected every one of Antonio's Notes. (To My Beloved Son)
- To My Beloved Son is the last of Antonio's Notes. It'll be received if you pick up the last note no matter what level it is on.
Arcade Bullet Locations:
- N/A
- If you replay the level then bullets will replace any Hearts or Pearls you had found previously.
Chest Locations:
- Verse 1-2: Immediately head right of the statues. You will need to use Panther Within to run and jump the gap. Once on the platform follow the railing until you see the chest.
- Verse 10-11: The chest is the room where you needed to jump up some floating platforms. Look to your right, the chest is in the back on the right side.
- Verse 11: The chest is the room where you jumped down into the hole and faced the flaming Affinities. It's at a back wall opposite the floating platforms. (Inside is a Red Hot Shot)
- Verse 13: As you run up the squares you'll come to a large strip of the big squares. To the left of the platform with the two doors is another platform. The chest is one that one.
- Verse 13: From the location above you will see two floating platforms. Cross them onto a third slightly larger platform. The chest is there.
Broken Moon Pearl Locations:
- Verse 13: As you run up the squares you'll come to a large strip of the big squares. To the left of the platform with the two doors is another platform. A chest is on that one, break it to get the Pearl Piece.
Broken Witch Heart Locations:
- Verse 1-2: Immediately head right of the statues. You will need to use Panther Within to run and jump the gap. Once on the platform follow the railing until you see a chest. Break it to get the Heart pieces.
- Verse 10-11: A chest is a room where you needed to jump up some floating platforms when you enter the room turn right, it's in the far back. Break the chest to get the Heart Piece.
- Verse 13: Start from the location of the first chest in this verse. If you look ahead you'll see a set of floating platforms, cross them to the third platform, and break open the chest to get the Heart Piece.
Golden LP Locations:
- N/A
Umbran Tears Of Blood Locations:
Normal
- Verse 1-2: Head immediately to the right of the Fearless statues and use Panther Within to cross the gap. Keep going until you can't move any farther. Go to the left-hand corner of the platform, the crow is directly above you so double jump and wall climb to reach it.
- Verse 11: After you jump out of the hole, go to the hole behind you. The crow will be to the right of the floating platforms, in a cage against the wall.
Hard
- Verse 10: In the darkroom where you have to destroy a fence to get to the Lift room. The crow is in a cage in the corner of the darkroom.
- Verse 13: After you have defeated Golem then jump onto the squares and head right. You'll soon come across a platform. The crow is in a cage on the platform.
Infinite Climax
- Verse 10-11: In the little room with the floating platforms, the crow will be on the left-hand wall.
Alfheim
- Verse 9: After you have defeated Temperance you need to backtrack all the way back to the beginning. The portal will be located on the platform that the first chest is on. (Reward: Broken Witch Heart)

| | ||||||||
| Items | Accessories | Rodin's Treasures | Techniques | Music | Nintendo Content | amiibo | ||

Source: https://bayonetta.fandom.com/wiki/Walkthrough/Chapter_XV:_A_Tower_To_Truth
0 Response to "Bayonetta Chapter 15 Verse 9 Easy Mode"
Postar um comentário